Mastering Remote SSH Raspberry Pi Over The Internet: A Comprehensive Guide
Connecting to your Raspberry Pi remotely over the internet using SSH is a powerful technique that opens up endless possibilities for managing your device from anywhere in the world. Whether you're a developer, hobbyist, or IT professional, this skill can streamline your workflow and enhance your productivity. This guide will walk you through every step of setting up secure remote access to your Raspberry Pi via SSH, ensuring your connection remains stable and protected.
In today's interconnected world, the ability to access your devices remotely is not just convenient but often essential. Whether you're troubleshooting a network issue or managing a server, SSH provides a secure and reliable way to interact with your Raspberry Pi from any location. This article will delve into the nuances of configuring SSH for remote access, offering practical tips and best practices to ensure a seamless experience.
Our goal is to provide you with a comprehensive, step-by-step guide that simplifies the process of setting up remote SSH Raspberry Pi over the Internet. From basic configurations to advanced security measures, we'll cover everything you need to know to achieve a stable and secure connection. Let's dive in!
Read also:Remoteiot Device Connect Software Download Your Ultimate Guide
Table of Contents
- Introduction to SSH
- Raspberry Pi Overview
- Enabling SSH on Raspberry Pi
- Securing Your SSH Connection
- Configuring Port Forwarding
- Using Dynamic DNS
- Alternative Remote Access Methods
- Troubleshooting Common Issues
- Best Practices for Remote SSH
- Conclusion and Next Steps
Introduction to SSH
SSH, or Secure Shell, is a cryptographic network protocol that facilitates secure communication between devices over an unsecured network. It is widely used for remote command-line login and execution, file transfer, and tunneling. SSH ensures data integrity, confidentiality, and authentication, making it the go-to method for secure remote access.
For Raspberry Pi users, SSH enables you to control your device from a remote location without needing physical access. This is particularly useful for headless setups, where the Raspberry Pi operates without a monitor or keyboard. By enabling SSH on your Raspberry Pi, you can manage files, install software, and perform administrative tasks from anywhere in the world.
Why Use SSH for Raspberry Pi?
- Security: SSH encrypts all data transmitted between your device and the Raspberry Pi, protecting it from eavesdropping and unauthorized access.
- Convenience: With SSH, you can manage your Raspberry Pi remotely, eliminating the need for physical access.
- Flexibility: SSH supports a wide range of commands and tools, allowing you to perform complex tasks with ease.
Raspberry Pi Overview
The Raspberry Pi is a credit-card-sized single-board computer developed by the Raspberry Pi Foundation. It has gained immense popularity among hobbyists, educators, and professionals due to its affordability, versatility, and ease of use. Equipped with a powerful processor, GPIO pins, and various connectivity options, the Raspberry Pi can be used for a wide range of applications, from home automation to robotics.
One of the key features of the Raspberry Pi is its ability to run a variety of operating systems, including Raspbian (now Raspberry Pi OS), Ubuntu, and others. This flexibility allows users to customize their setup according to their needs, making it an ideal platform for experimentation and development.
Raspberry Pi Specifications
- Processor: Broadcom BCM2835 or later
- Memory: Varies from 512MB to 8GB depending on the model
- Connectivity: Ethernet, Wi-Fi, Bluetooth
- Storage: MicroSD card
Enabling SSH on Raspberry Pi
Before you can connect to your Raspberry Pi remotely over the internet, you need to enable SSH on the device. This process is straightforward and can be done either through the graphical interface or the terminal.
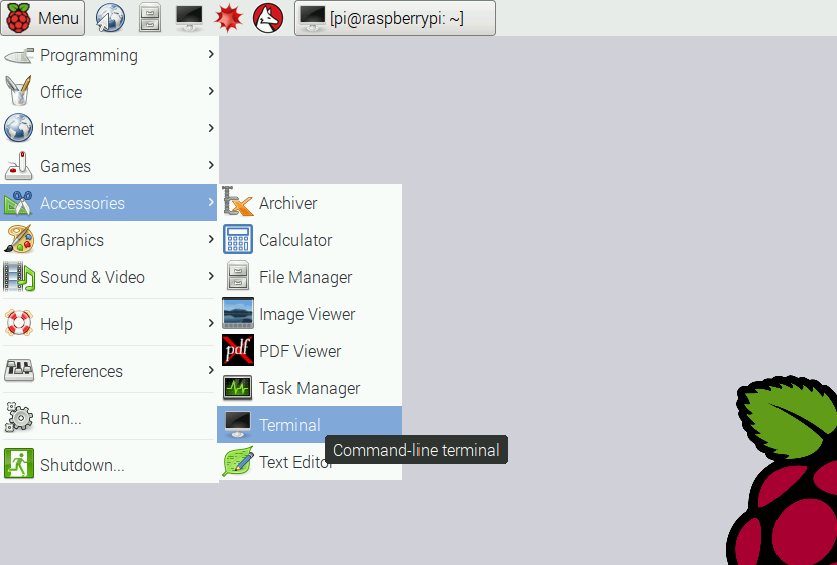
Method 1: Using the Raspberry Pi Configuration Tool
- Open the Raspberry Pi Configuration tool from the Preferences menu.
- Navigate to the "Interfaces" tab.
- Select "SSH" and choose "Enabled."
- Reboot your Raspberry Pi for the changes to take effect.
Method 2: Enabling SSH via the Terminal
If you're using a headless setup, you can enable SSH by running the following command in the terminal:
Read also:Securely Connect Remote Iot Vpc Raspberry Pi Download And Windows Free Guide
sudo systemctl enable ssh
This command ensures that SSH starts automatically when your Raspberry Pi boots up. You can also start the SSH service manually using:
sudo systemctl start ssh
Securing Your SSH Connection
Security is paramount when setting up remote SSH Raspberry Pi over the internet. Without proper precautions, your device could become vulnerable to unauthorized access. Here are some steps you can take to secure your SSH connection:
1. Change the Default SSH Port
By default, SSH runs on port 22. Changing this to a non-standard port can deter automated attacks. To do this, edit the SSH configuration file:
sudo nano /etc/ssh/sshd_config
Locate the line that says "Port 22" and change it to your desired port number. Save the file and restart the SSH service:
sudo systemctl restart ssh
2. Disable Root Login
Allowing root login via SSH poses a significant security risk. To disable it, edit the SSH configuration file and set the "PermitRootLogin" option to "no." Restart the SSH service afterward.
3. Use Public Key Authentication
Public key authentication is a more secure alternative to password-based authentication. To set it up, generate a key pair on your local machine:
ssh-keygen -t rsa -b 4096
Copy the public key to your Raspberry Pi:
ssh-copy-id pi@your_raspberry_pi_ip
Configuring Port Forwarding
To access your Raspberry Pi over the internet, you need to configure port forwarding on your router. This process varies depending on your router model, but the general steps are as follows:
- Log in to your router's web interface.
- Navigate to the port forwarding settings.
- Create a new rule, specifying the internal IP address of your Raspberry Pi and the SSH port (default is 22).
- Save the changes and test the connection.
Using Dynamic DNS
Most home internet connections use dynamic IP addresses, which change periodically. To maintain a stable connection, you can use a Dynamic DNS (DDNS) service. DDNS maps a domain name to your changing IP address, allowing you to access your Raspberry Pi using a consistent URL.
Popular DDNS Providers
- No-IP
- Dynu
- duckdns.org
Sign up for a DDNS service and configure it on your router or Raspberry Pi to ensure your domain name always points to your current IP address.
Alternative Remote Access Methods
While SSH is the most common method for remote access, there are other tools you can use depending on your needs:
1. VNC (Virtual Network Computing)
VNC allows you to access the graphical desktop of your Raspberry Pi remotely. It's particularly useful for tasks that require a graphical interface.
2. Web-Based Interfaces
Some applications, such as Home Assistant, provide web-based interfaces that you can access through a browser. This eliminates the need for SSH or VNC.
Troubleshooting Common Issues
Even with careful planning, issues can arise when setting up remote SSH Raspberry Pi over the internet. Here are some common problems and their solutions:
1. Connection Timeout
If you're unable to connect to your Raspberry Pi, ensure that:
- SSH is enabled on your Raspberry Pi.
- Port forwarding is correctly configured on your router.
- Your firewall is not blocking the SSH port.
2. Permission Denied (Public Key)
This error typically occurs when public key authentication is misconfigured. Double-check that your public key is correctly added to the authorized_keys file on your Raspberry Pi.
Best Practices for Remote SSH
To ensure a smooth and secure experience, follow these best practices:
- Regularly update your Raspberry Pi's software to patch security vulnerabilities.
- Use strong, unique passwords for all user accounts.
- Monitor your SSH logs for suspicious activity.
- Limit SSH access to trusted IP addresses if possible.
Conclusion and Next Steps
Setting up remote SSH Raspberry Pi over the internet is a valuable skill that can enhance your productivity and expand the capabilities of your device. By following the steps outlined in this guide, you can establish a secure and reliable connection that allows you to manage your Raspberry Pi from anywhere in the world.
As you continue your journey with Raspberry Pi, consider exploring additional tools and techniques to further enhance your setup. Whether it's automating tasks with scripts, setting up a home server, or building IoT projects, the possibilities are endless.
We encourage you to share your experiences and insights in the comments below. Your feedback helps us improve and provides valuable information to other readers. Don't forget to explore our other articles for more tips and tutorials on Raspberry Pi and related technologies!
References:

